In order to make a button you need to have an image or a background that you can write the name of your site on. A very easy way to do this is to search google images for backgrounds, patterns, fabric backgrounds, purple images - whatever you want. A really good source for images is to do a google image search for free vector backgrounds or free vector images. You can spend a lot of time searching through the images, once you find the image that you want to use you will have to save it to your computer. Click on the image of your choice and once the page loads with the picture, right click it with your mouse, click on save picture as and save it to your computer in a place were you can find it easily.
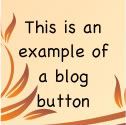
I'll use this image for my example:

Once you have your image saved on your computer you need to upload it to Photobucket so that it will be online. Just log in to your account and click on upload images. Find your picture that you saved to your computer and double click it so that it will upload. Add the title and tags if you want to then return the picture to the folder. Now, click on edit in the left corner right above the image. This will take you to the editing menu for the image.
The first thing that you need to do is to crop the image so that it is 125 X 125. Click on crop at the top and then place your mouse on the image and click where you want to start cutting the image. You can drag the box around to cut the part that you want and it will say the size so just adjust the side and the top so that you have a 125 X 125 size image.
Here is what I cut out.

Now you can click on decorate at the top of the page and then click on text. Under text options, check transparent then type the name of your blog and any other text you want into the box and pick the font and color that you want and adjust the size until it looks the way that you want it to.
All that you need to do now is save your image, the save button is at the bottom of the page, and copy the HTML code from the Share This Image Box beside your new image. Now you have your very own, custom made button to represent your site.
In order to make your button clickable so that it will direct people to your site when they click on it you will need to add an extra piece of code to the HTML code that you copy from Photobucket. The code that you copy for your image is going to look something like this:
<img src="http://i813.photobucket.com/albums/zz53/mandz81/abstract_background-1-1.jpg">
To make your image into a clickable link that will open in a new window you have to add this piece of code in front of your image code:
<a href="URL of Your Site" target="_blank">
So, the entire code for your button will look like this:
<a href="URL of Your Site" target=_blank"><img src="URL of your image">
That's it, you have a fully functional blog button that you can use wherever you want to. Now you can read my other blog post, Display HTML in a Scrollable Box, so that you can display the code for your button on your blog so others can grab your button and add it to their site.

24 comments:
Amanda, this is great and I love how you walk us through it! I agree, everyone should have a button on their blog!
Thanks for the posting!
What a great idea - thank you for sharing. I've thought about doing this so many times, this makes it so easy! Thanks again!
kristin
Amanda thank you for taking the time to find this information.. Ugghhh I have been wanting a button. Thanks again!
G
great tip! Thanks!
oh thank you so much...i've been wondering how to do this...off to make a button now!
Thank you! I am finally starting to understand :)
great tutorial. Very helpful and easy to understand!
Thank you!! I'd love to make a button of my own...the ones I already have were ready made, and I'd like something a bit more personal to add to my blog. Will be off to try it soon :-)
Thank you!! I'd love to make a button of my own...the ones I already have were ready made, and I'd like something a bit more personal to add to my blog. Will be off to try it soon :-)
I have a button and used Picasa, but I m going to use what you gave me and try to follow it and make another button.
Thanks for the lesson.
Thanks! Great tip!
Hmmm...this is good stuff...
Helpful too and easy to follow...
I haven't gotten around to designing as yet..Though I cheat a bit cause I use HTML and Photoshop regularly and other similar software.
I love this. I've been looking for this info for days! thanks so much Amanda. Once I do my button, I'll show it to you...
This is a great tutorial! Love your blog too! :)
This was extremely helpful. Thank you so much. Come check out my button!
This tutorial was great! I've been trying to figure this out for a while now!
Thanks so much!
Thanks for the help!
I soooooooooo needed thisssss!!! lol. THANKS HUN &Happy new Year!
Thank you so much. This really helped.
MANDA, THANK YOU THANK THANK YOU!
I'm so glad someone else on BloggyMoms asked you about this again; I had misplaced the info I thought I'd saved.
You're the best! :)
~Maura
The Moxie Bee
http://www.themoxiebee.com
Awesome info! Thank You
Thanks! It works perfectly!
Alyssa 8-)
alyssa-like-pie.blogspot.com
This is a great post! Been trying to do this for a while, just never got to it until today. Mine turned out great! Thank you again! :-D
I think I love you! You are awesome. Great instructions!
MaryAnn
www.chapter-by-chapter.weebly.com
Post a Comment